Adding Google Analytics to a Next.js App
8/8/2020
Since moving this site to Next.js, I've had to figure out the best way to serve my Google Analytics script. Here is how I did it, which is based on this example published by Vercel.
Getting Your Google Analytics Tracking ID
If you haven't already, go to Google Analytics and sign up for an account. This post won't go into the details of that but it's pretty easy. Once you're logged in to your account, grab your Tracking ID that looks like this: UA-XXXXXXXX-X.

Environment Variables With Next.js and Vercel
If you're not using Vercel for your deployment, that's ok - these steps will still apply to you and whatever hosting option you're using. There's just some extra sweet stuff that Vercel does to make life easier for this step.
We're going to add our Tracking ID as an environment variable. This isn't super important since it's publicly available info when your page loads - but I like to have all my config in one spot and also why not. To make an environment variable public in Next, we need to start the name of this variable with NEXT_PUBLIC. This tells Next to make sure that we can use it in the browser, which is exactly what we want when adding our analytics variable.
Create an .env.local file the root of your Next app. Make sure to go to your .gitignore and add .env.local so that you do not commit this file.
Add your analytics variable:
NEXT_PUBLIC_ANALYTICS_ID=UA-XXXXXXXX-XGo to your hosting provider and add that variable and value. If you're using Vercel, it's really easy to do through the Dashboard of the project and configure it. What's also neat about using Vercel is that you can run vercel env pull .env.local in the root of the project to generate the project's .env.local file on-the-fly, which rules.
Adding Scripts in Next.js
Now we need to read this environment variable and in our analytics script. Add a file called _document.js in the Pages folder. In this file, we can interact with the document's <head> and surrounding <html> tags. This is the file where you can add stuff including font URLs, custom meta tags, and in our case - Google Analytics.
Note: This isn't the only file where you can interact with the document's <head>, if you wanted to have a dynamic page title, for example, you could import Head from next/head to a Layout component to populate a custom page title or any custom script/meta value. You won't need to copy all of your analytics stuff over, either, since it just appends to the <head> rather than overwriting anything. More info here.
Add the code below to _document.js:
// in src/pages/_document.js
import Document, { Head, Main, NextScript } from "next/document";

export default class MyDocument extends Document {
  render() {
    return (
      <html>
        <Head>
          {/* Global Site Tag (gtag.js) - Google Analytics */}
          <script
            async
            src={`https://www.googletagmanager.com/gtag/js?id=${process.env.NEXT_PUBLIC_ANALYTICS_ID}`}
          />
          <script
            dangerouslySetInnerHTML={{
              __html: `
            window.dataLayer = window.dataLayer || [];
            function gtag(){dataLayer.push(arguments);}
            gtag('js', new Date());

            gtag('config', '${process.env.NEXT_PUBLIC_ANALYTICS_ID}', {
              page_path: window.location.pathname,
            });
          `,
            }}
          />
        </Head>
        <body>
          <Main />
          <NextScript />
        </body>
      </html>
    );
  }
}
Testing and Filtering our IP Address
Now you'll want to send some test traffic to make sure it's working. Deploy your most recent changes. Go to your analytics account and click the "Send test traffic" button (Admin > Tracking Info > Tracking Code). You should see stuff populate - if not, go to your live site and inspect the script in the HTML. Make sure the script is there with your Tracking ID.
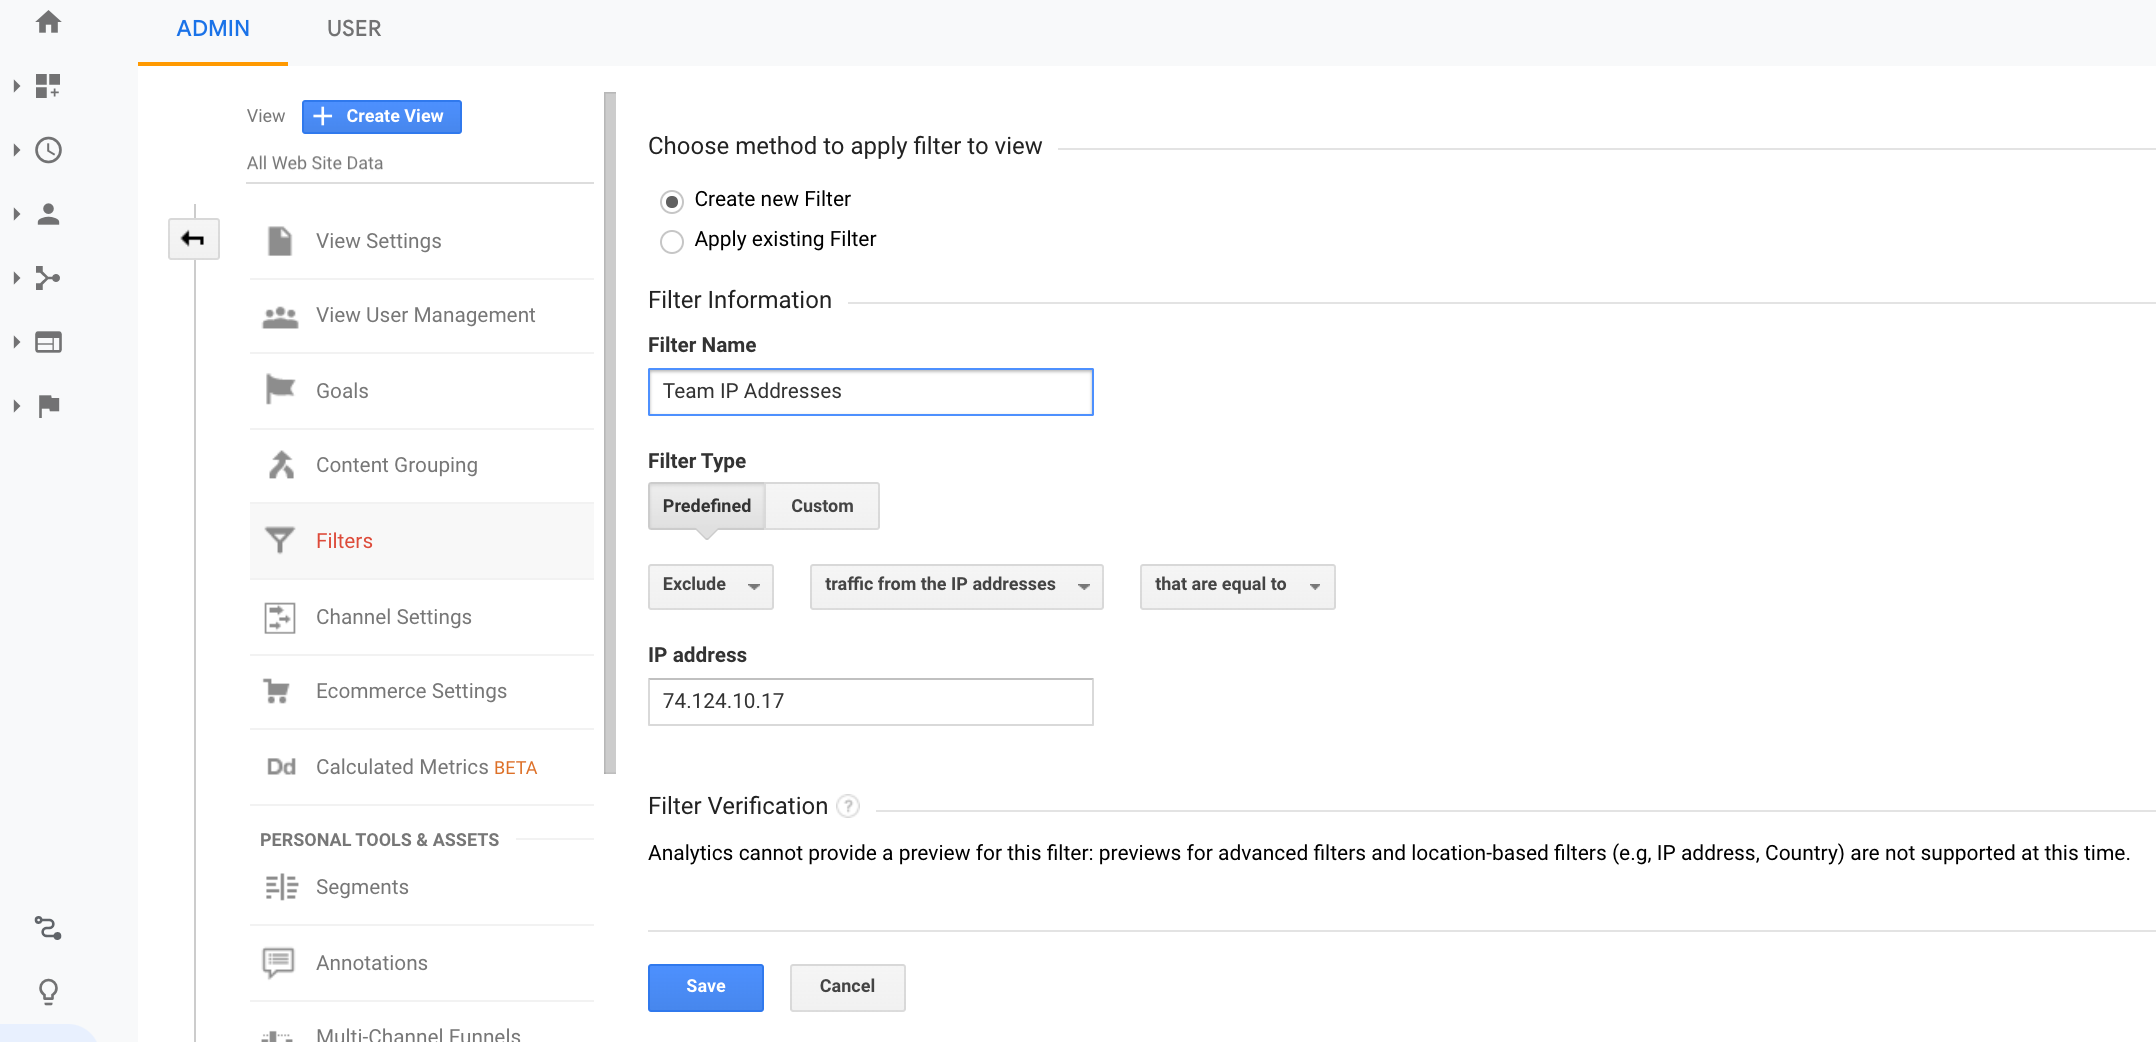
Once that's all good, you can filter out you and your team's IP addresses so that Analytics doesn't count your visits as page hits. Google "what's my IP address" and copy it. Go to Admin > Filters > Add Filter. Add in all the relevant IPs that should be ignored.
This should get you all setup with analytics in Next.js. Good luck!